Reduce Waste. Reuse your coffee stopper
- Created and Made in the Midwest, USA
- Reduces single-use plastic waste
- Recyclable ABS plastic
NEW! Sleeve and Lid

Patent pending
- Flexible and holds tightly to the keeper
- Grips a variety of short stoppers
- Currently in Ruby Red
Only available for shipping in the U.S.
Want some for your company's next promotional give-away?
Discounts for bulk ordering blank Stopper Keepers for your logo.
Quantities: 20s, 100s, 1000s
Pricing, inquiries, or licensing can be made by emailing inquiry@stopperkeeper.com.
Thank you!
Hand Painted: Coffee, Ranger Green, Ruby

The Idea
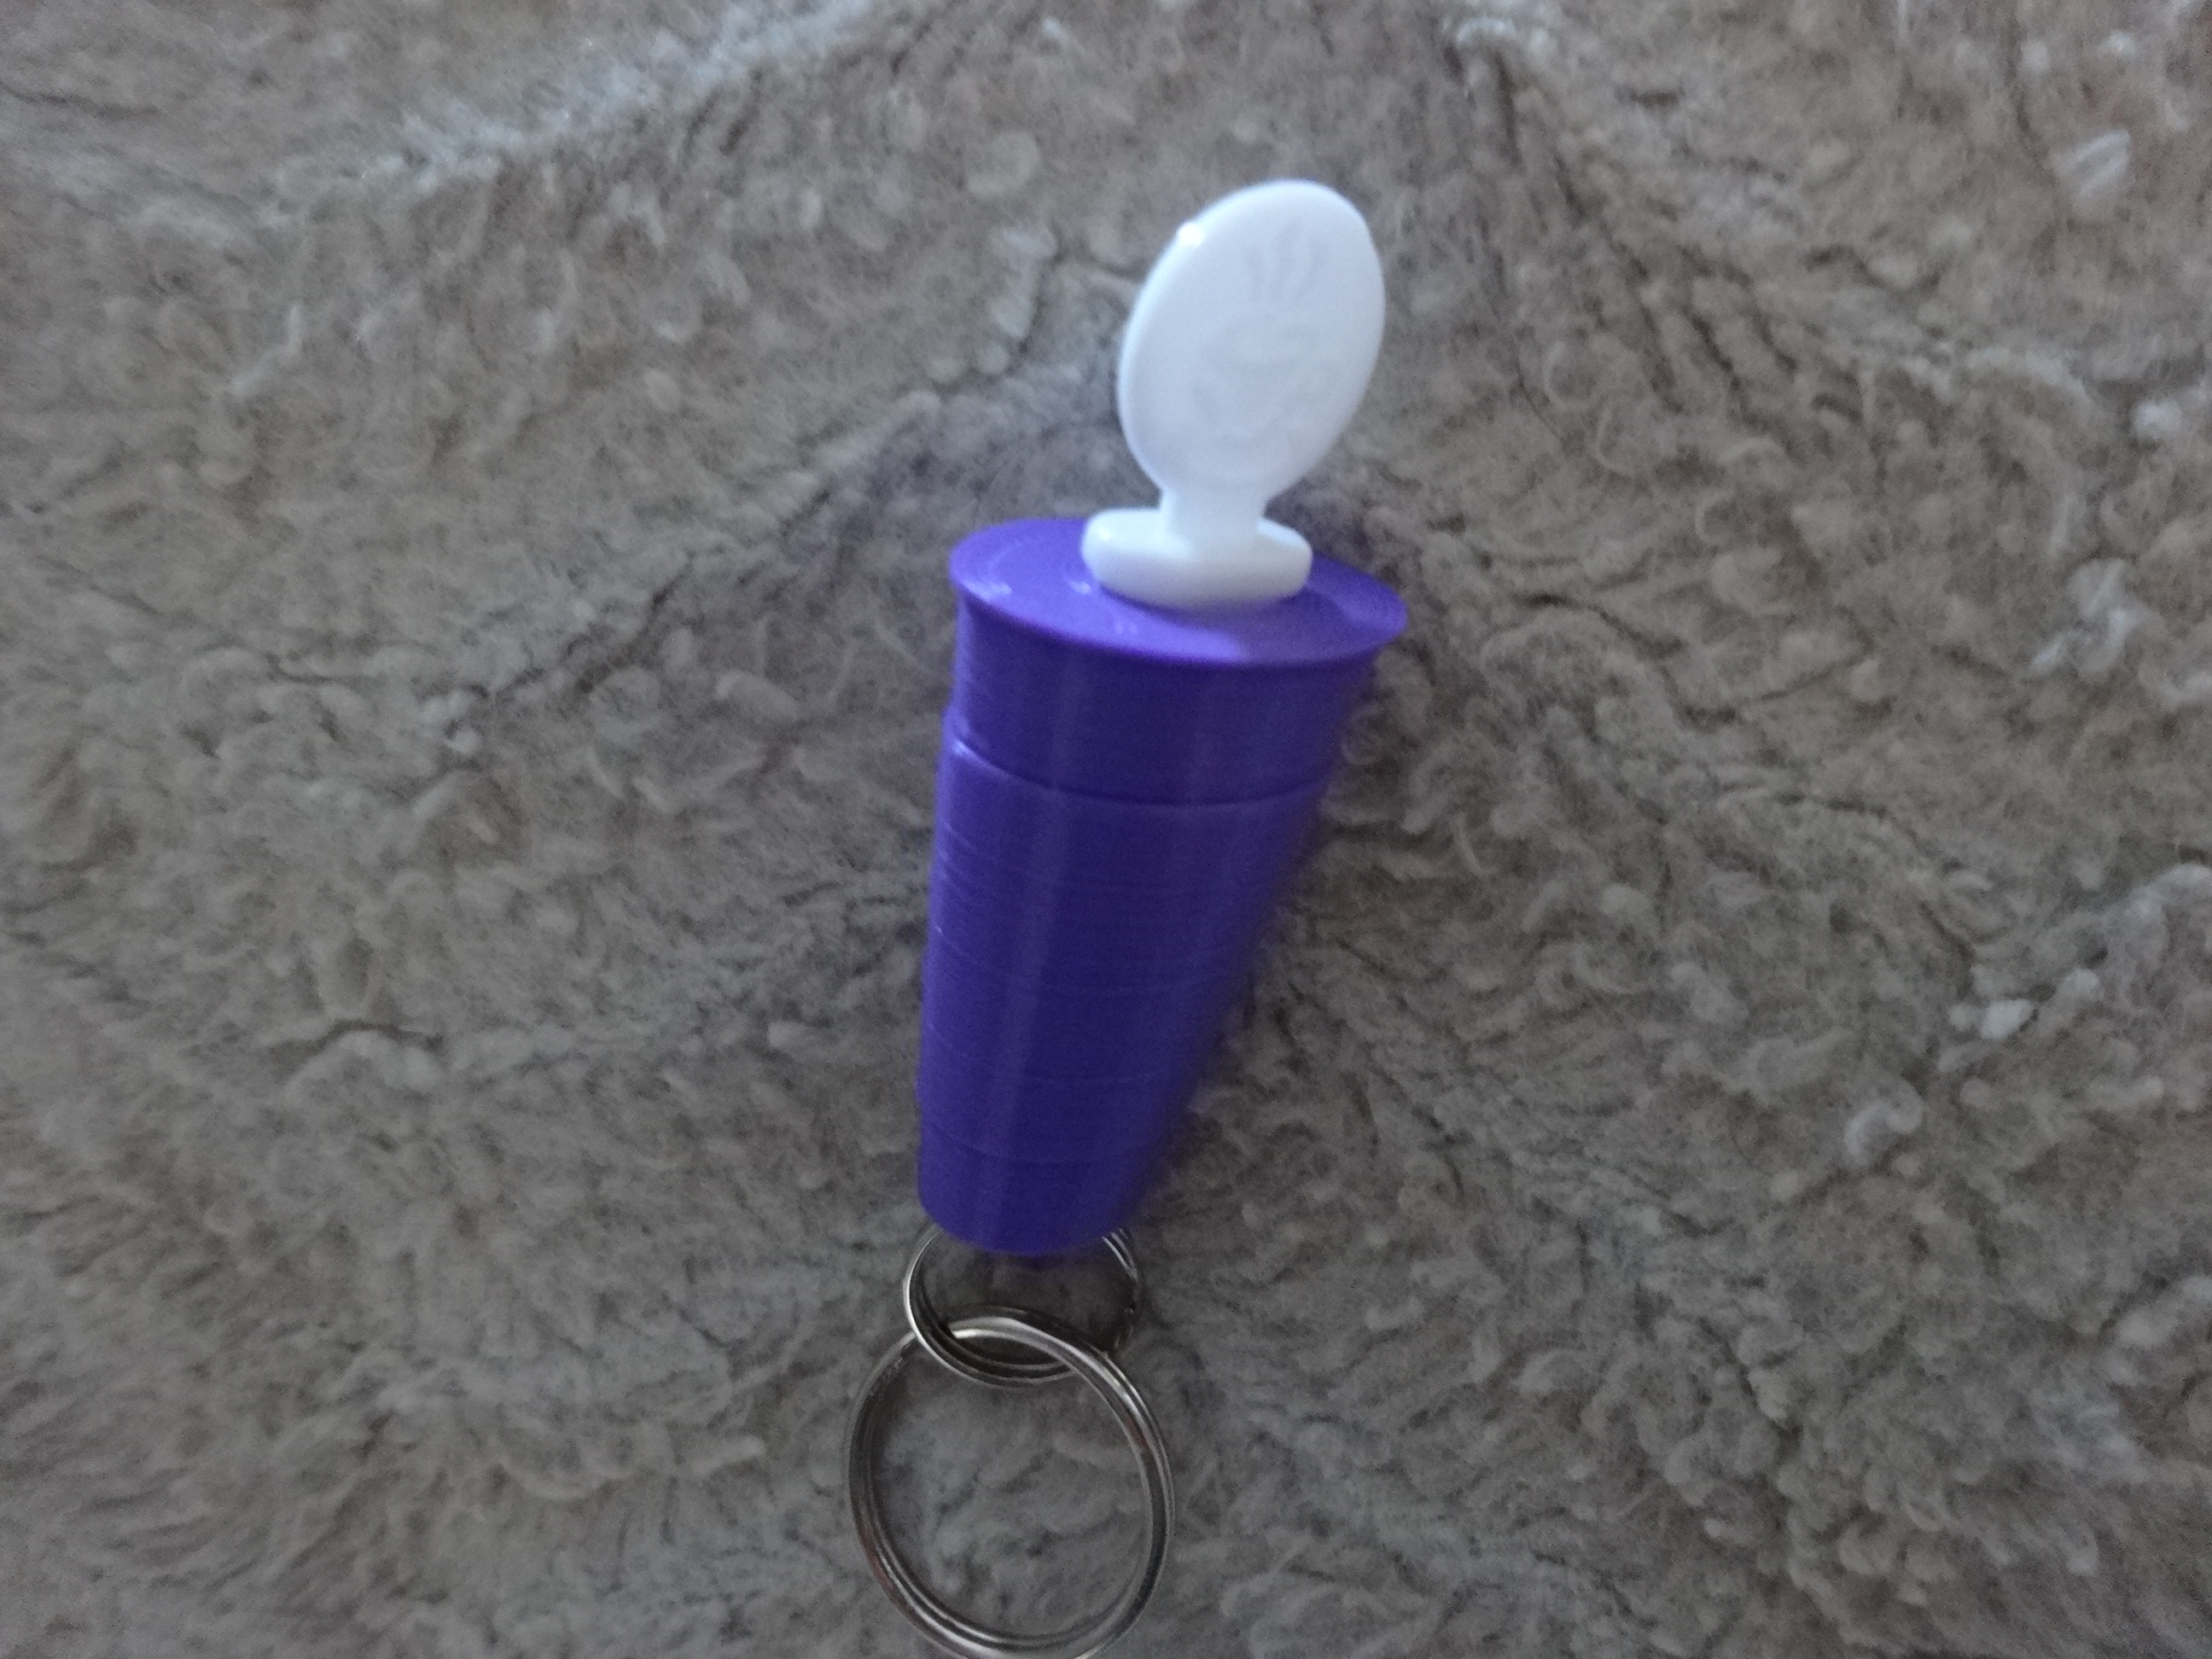
The Coffee Stix (AKA stoppers, stirrers, plugs) are brilliant. How many roads' evil attempts at spilling our drinks have been foiled by these stoppers? In fact, they're so useful, I keep 1 in my car, 1 in my backpack, and 1 at the office so I can reuse, rather than discard them.
Growing up in the 80s/90s, we chanted "Reduce, Reuse, and Recycle" in school auditoriums. Do you remember seeing these images of decomposed animals? They had single-use waste that couldn't pass through their systems.
The fall of 2020 is when the idea struck! A "holder" for my stoppers so I wouldn't have them lying about on unsanitary surfaces.

A Process Journal for the Curious-Minded
I couldn't find articles like this to show the whole process of inventing something, so I'm making one for others. I hope it's useful, or amusing.
How it was Invented
Creating something for the first time is overwhelming. I had no idea where to start. All I knew, is that any new endeavor requires persistent, incremental, forward movement (AKA baby steps). How do you eat an elephant?
Baby Step #1
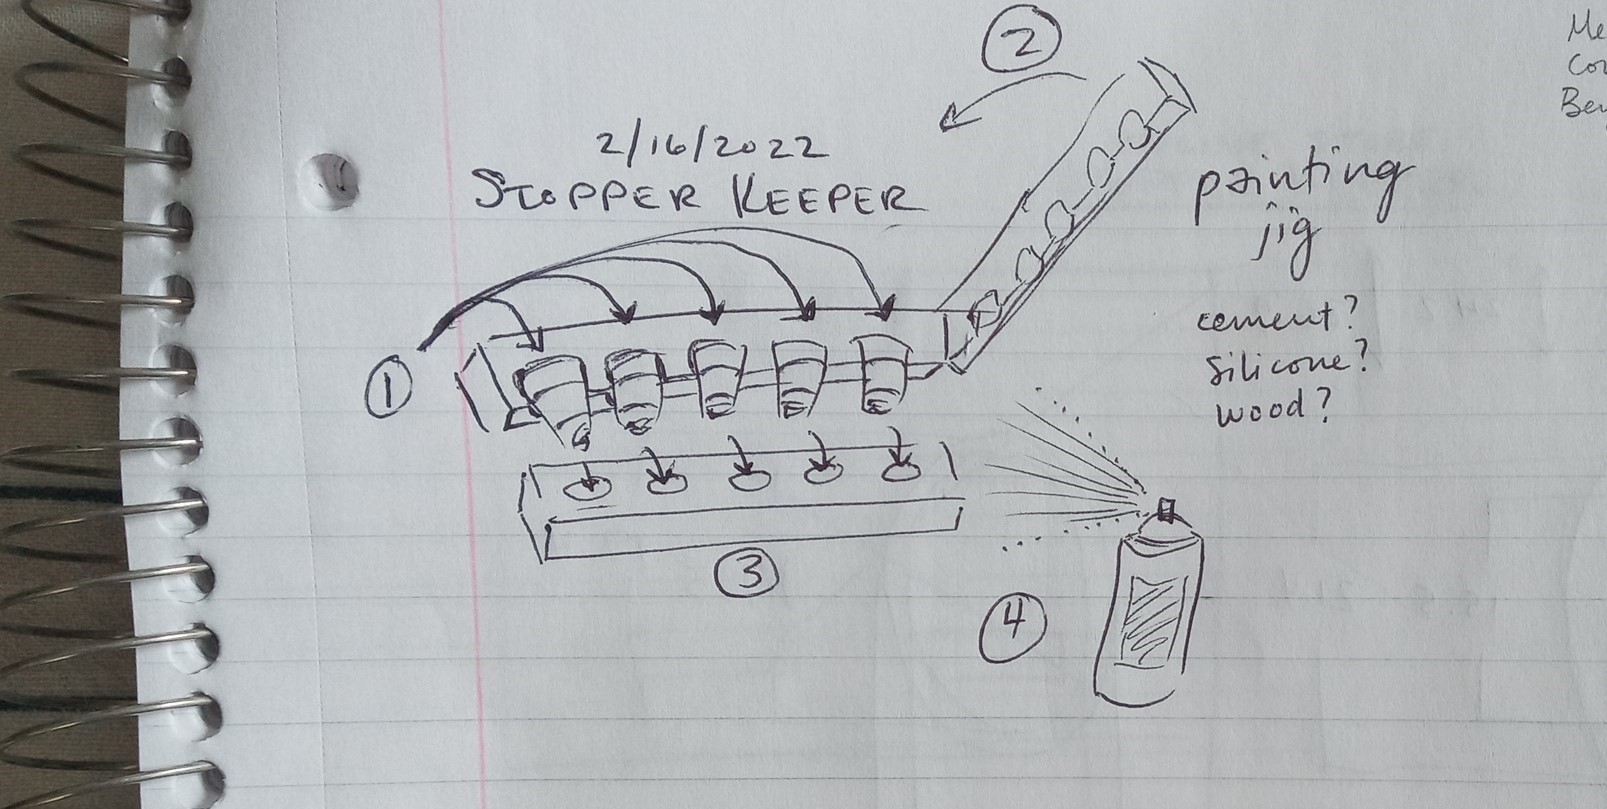
Sketch out the idea.
Nothing fancy, but get the point across.
The only requirement was an opening to hold the small coffee stoppers you find at your local hangout.
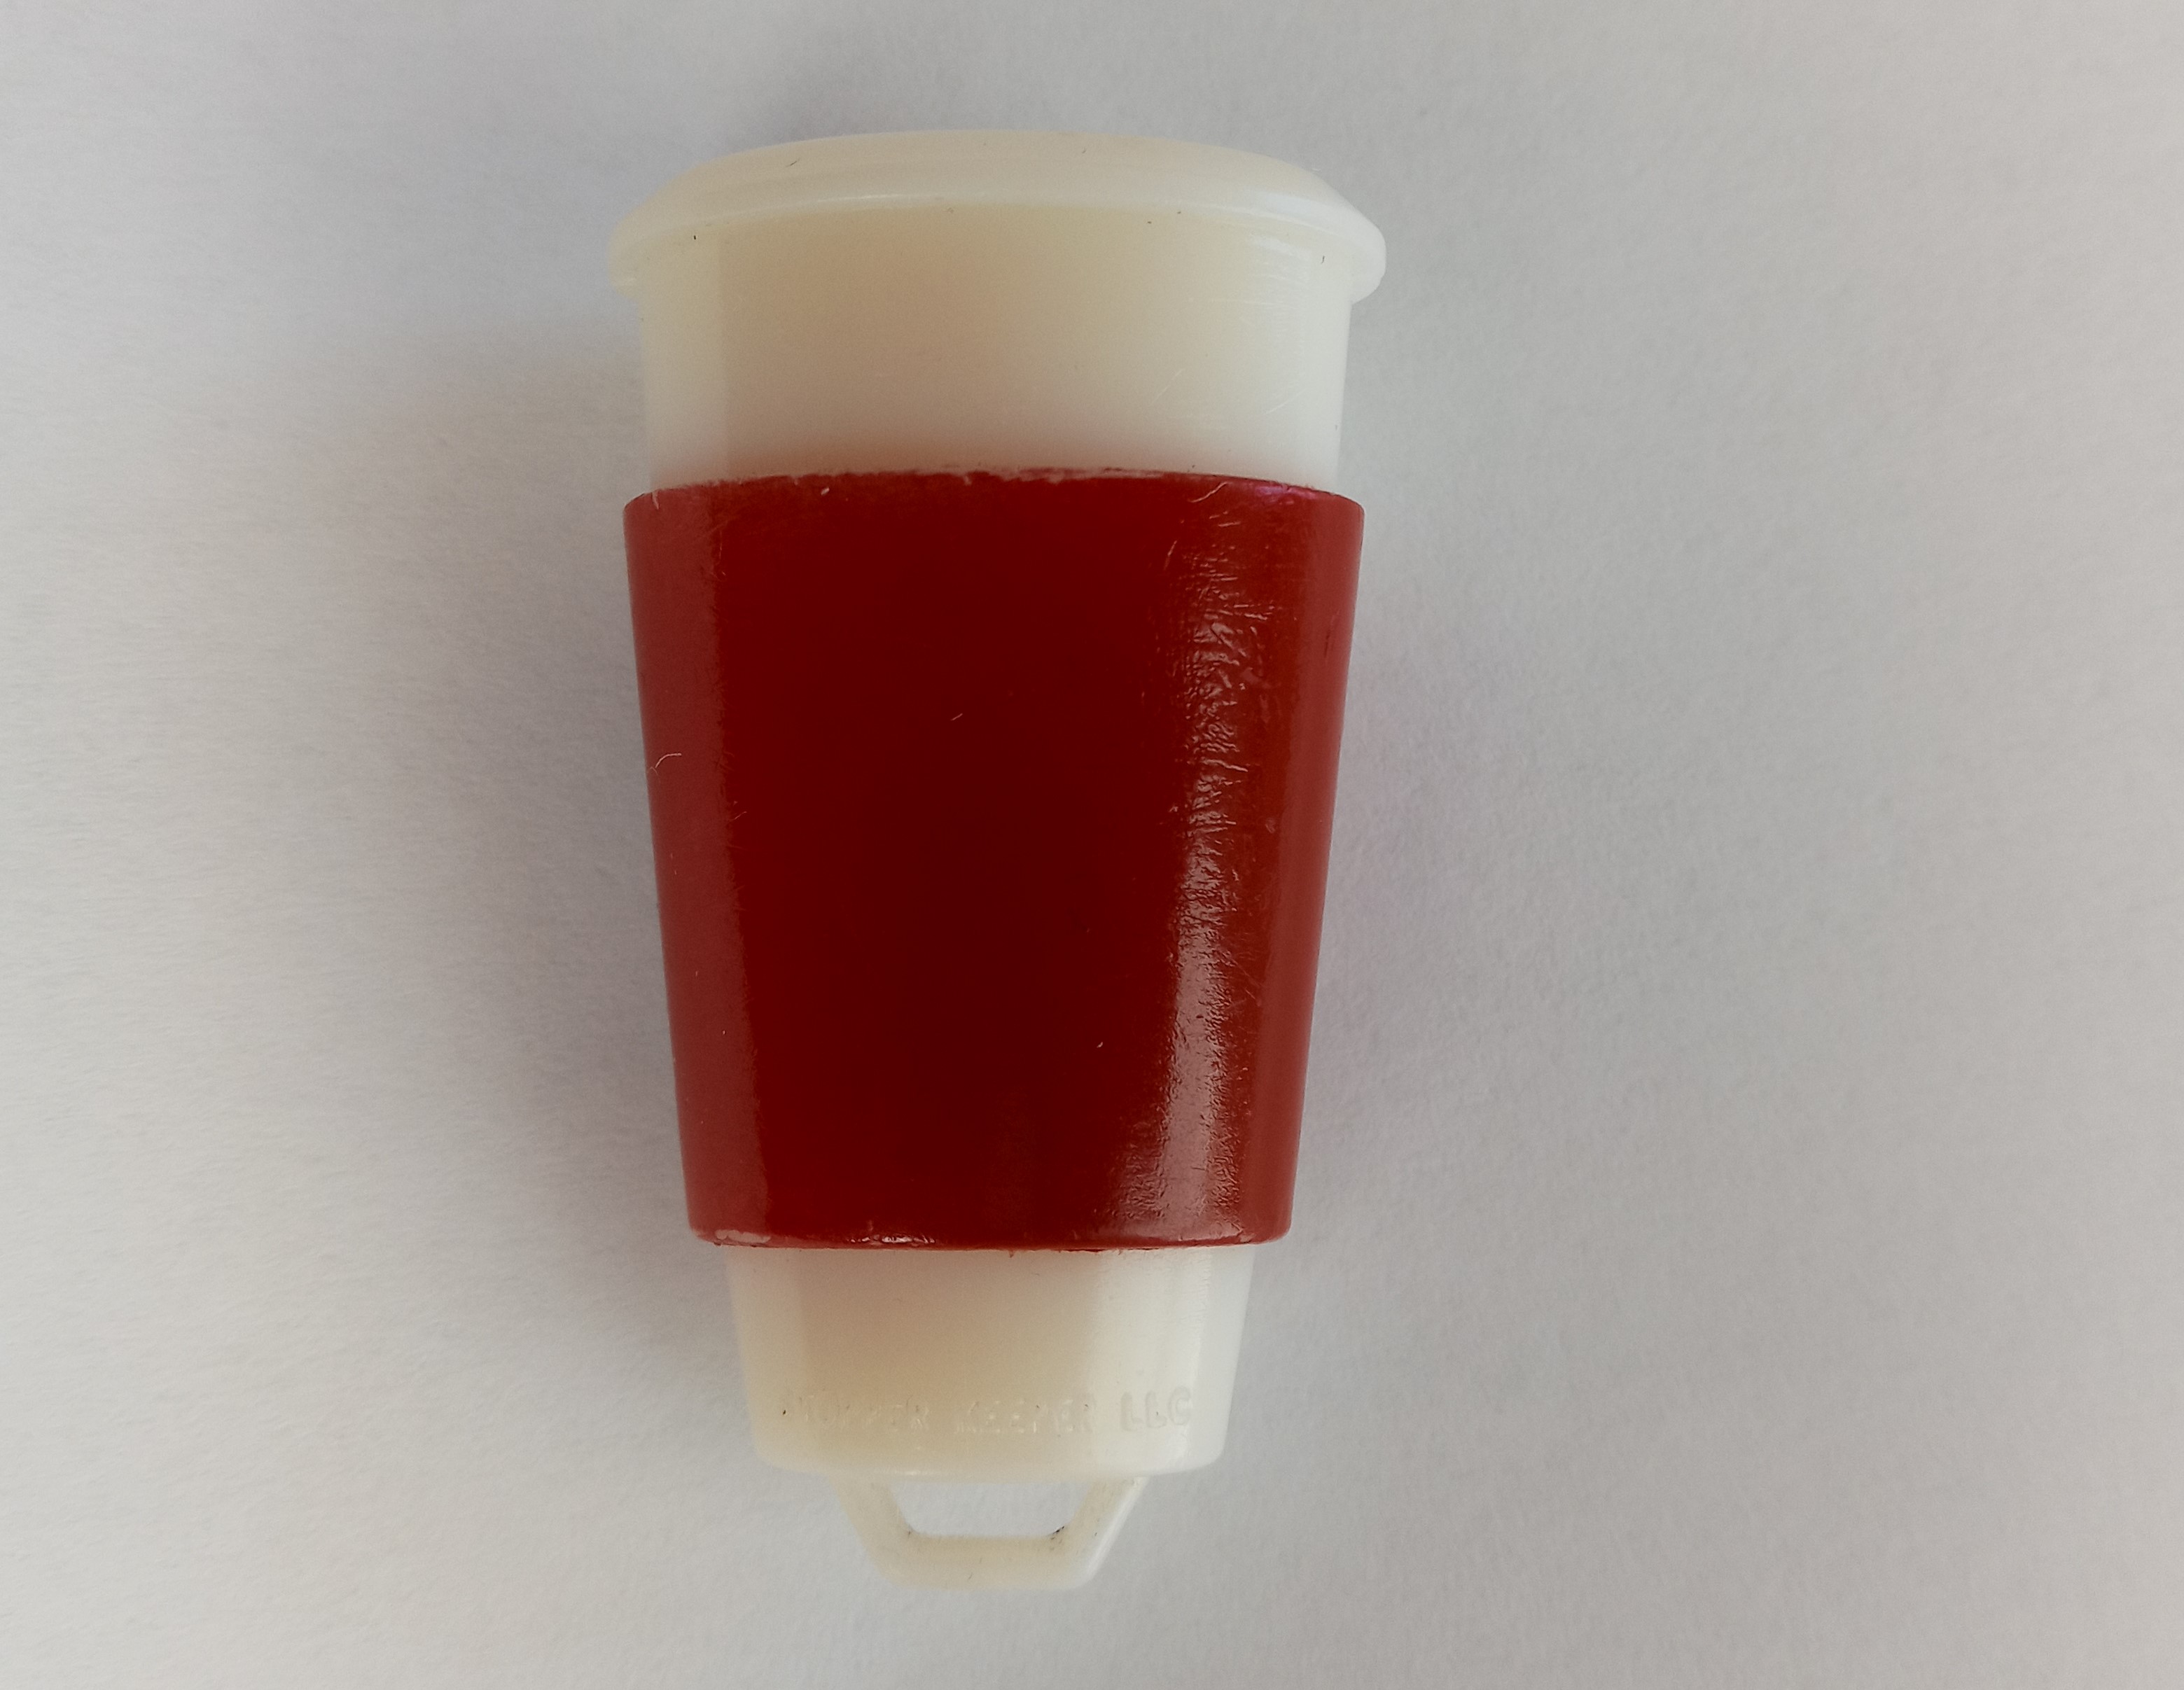
Other than the hole, it was a blank slate, so I just picked a shape that might work. The sleeved coffee cup was the first design. There are others, but I'm sticking with the cup for now.

Baby Step #2
Build a model
Once you have a finalized sketch, it's time to model it.
You can do this with physical materials, such as clay or wood, or you can hire someone to model it for you.
I wanted to learn how to model with a 3D program (Blender, it's free).
If you learn a little bit each day, you'll progress. It was slow going at first, but after a couple of days of tutorials, it began clicking.

Baby Step #3
Engineering the prototype
If your product is more complex than this simple one-body example, you'll likely need to work directly with
a team of engineers at the manufacturing company. SHOP AROUND!
I wanted to tackle this simple prototype with as little up-front cost as possible. A friend of mine owned a 3D printer at the time, and he gladly helped me out in this endeavor. Thanks Kevin!
After having a successful product in my hands, I began showing friends, family, and local baristas. Your excitement becomes their excitement, which reinforces your excitement.
Lull #1
Relax in the lulls
This is when the first lull hit me, because I knew the next step was going to be a doozy.
It required funds, a lot of funds. Not only that, I was going to sound like a complete buffoon to manufacturing companies.
I didn't know the jargon or types of plastic.
But, hey! baby steps, right?
On one spontaneous occasion, I shared my prototype with my co-worker, H, and he was pumped. To my bewilderment, he had connections at Bruin Manufacturing, a company that makes plastic products, in Marshalltown, IA. The team there is excellent, and I highly recommend them.
I reluctantly reached out to Bruin, knowing full well that I was a Noob. They told me what they needed ... something called a STEP file. Nope. Didn't have one of those. No worries, though. Their team converted my 3D printing file (STL).
I didn't shop around, and I probably should have, as it's generally what you should do. I just trusted Bruin to work with me in an honorable way, because of our mutual connection. They did.
Baby Step #4 & #5
Quotes
Then came the quotes for an aluminum injection mold and the first batch of 5000 pieces. Ouch! I wasn't ready for that one.
Just a heads up, molds aren't cheap.
Forking over the dough
After months of saving, I said goodbye to all the coffee I could've bought in that time.
They made the process easy, and helped me finalize the exact sizing of the mold.
Baby Step #6
Prepare other components
While Bruin was doing their thing, I reached out to some "Made in USA" keyring companies.
I don't like bunched up objects on my key chain, so a double key ring was what I wanted.
I found the Worth Company, which has a great selection to choose from.
Upon receiving the order, our family began assembling 10,000 individual rings into 5,000 double rings while we waited for the shipment of stopper keepers to arrive.

Shortly under a year since the start of this whole process, I had 5000 blank stopper keepers at my door.
Pretty, huh?
Baby Step #7
Function, meet FORM
I had 5000 blank slates in front of me. How do you go about dressing up a product?
Well, we bought some spray paint from a craft store, taped the top and bottom, and created the first finished Stopper Keeper with a red banded sleeve.
As you can see, using tape isn't a perfectly clean method.
Lull #2
This is when the 2nd and biggest lull hit: Trying to find a printing company that could print the red band around the eliptical sleeve. After many calls and emails, and many months, no company could help me (that I know of yet).
I originally wanted colored flexible "sleeves" to pull over the keeper. Maybe down the road, as it's a fun idea. However, I couldn't afford another mold $$$.
Baby Step #8
Stay on course
This meant only one solution, painting. The amount of work it'd require didn't excite me.
I'd have to design a jig to paint them at home.
Inspiration #1
If you haven't watched "The Crafsman" , then you are missing out! Stop reading this, and go spend your time watching his videos. I don't know how I found him, but I'm glad I did, as his creative and patient manner helped a great deal with the next step.
Baby Steps #9.1 & #9.2
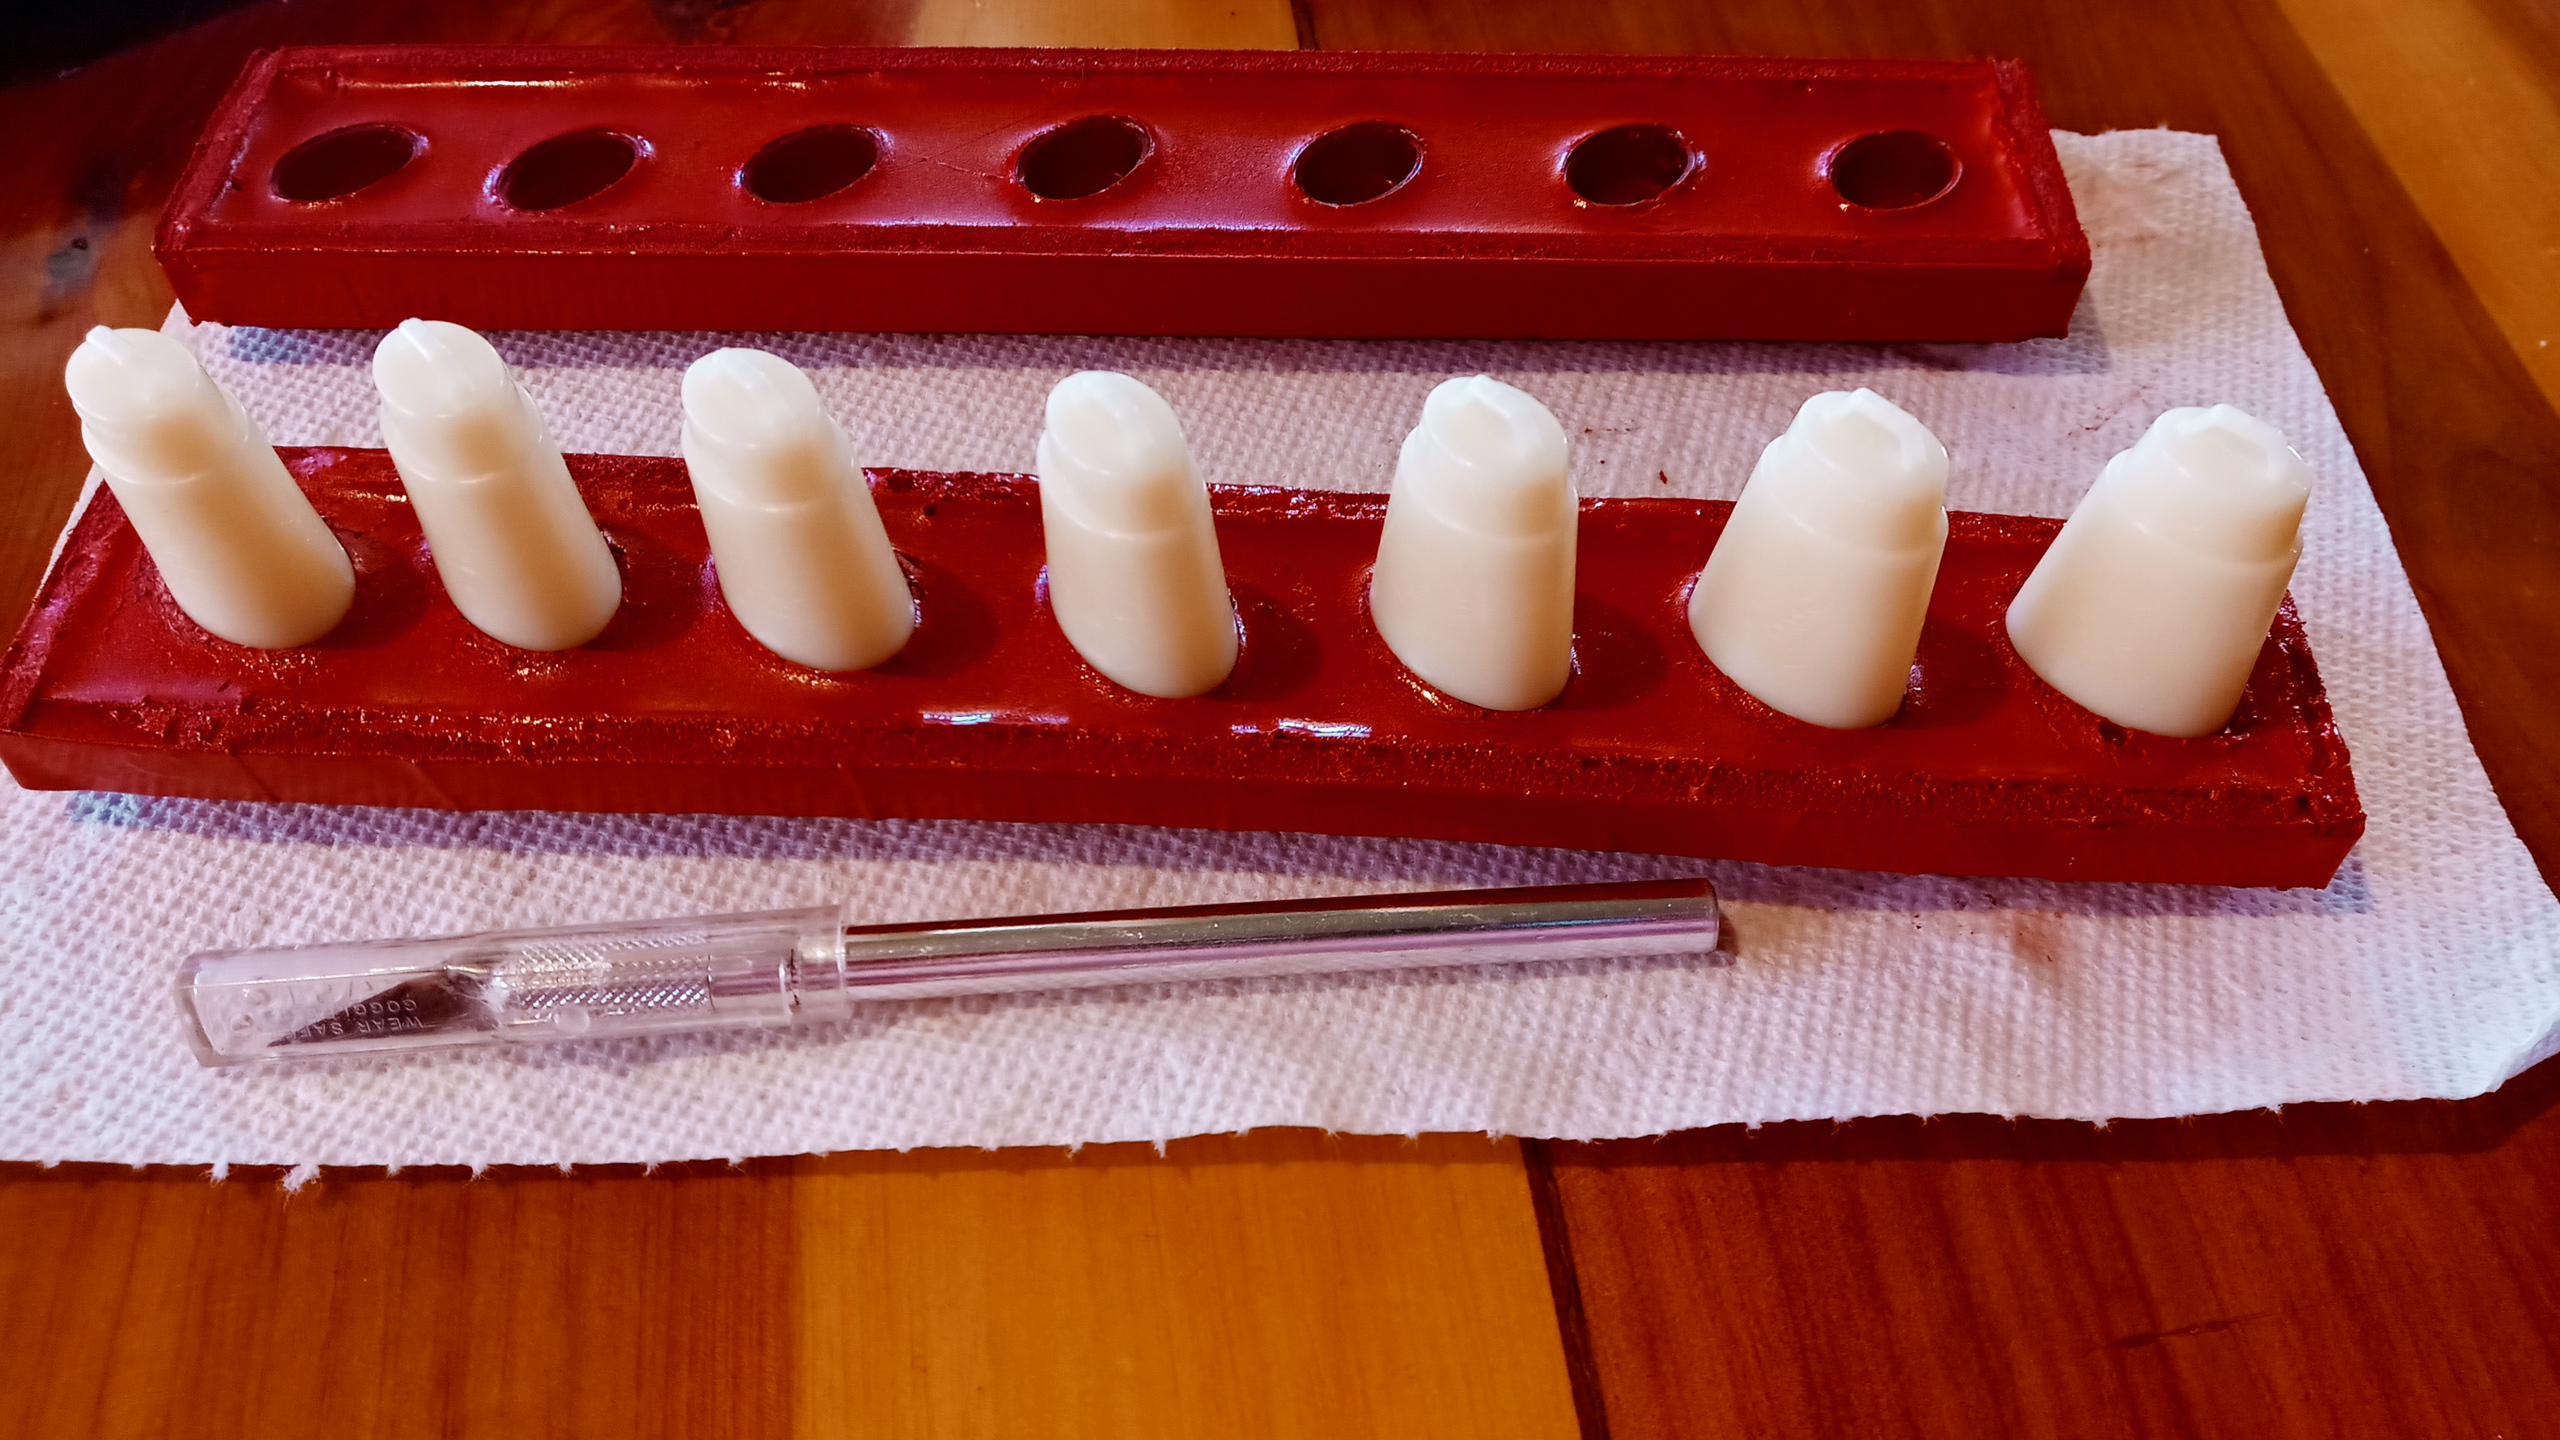
Newly inspired, I thought the answer to my problem was a rubber(ish) mold that I could pop the blank keepers in, paint, and pop out.
Talk about failing, dusting off, and trying again. This took a full week of trials, errors, and adjustments (all the while, my family was out of town). I used a rubbery mold (Amazing ReMelt) and foam core.
Sadly, it didn't give me clean-cut painted lines. I'm still grateful for the experience and I'm excited to try other projects with my family.
The only way forward, and my [seemingly] last hope, was to 3D print jigs that would surely have clean lines, right? *gulp
It demanded, however, that I buy a 3D printer and learn how to use it. So, I dropped a few hundred dollars on the Snapmaker's Original 3-in-1 3D Printer/Laser/CNC.
Baby Step #10
To start, I wanted to make a base that the stopper keeper can sit in. I couldn't worry about the top yet, that was for tomorrow to worry about.
It took SEVERAL iterations before settling on the final base (far right).
Now, for the Top. I took a baby step.
Baby Step #11
I started by creating a band that fits between the sleeve and the "lid." You can see the iterations and changes I made. All-in-all, it took many fails to get to the final clip.
Baby Step #12
An idea came that I hadn't thought of before: Create a 3rd jig piece that would "cap" the top. Before, I wanted one massive jig to hold 10+ keepers. This new cap idea seemed to be quicker and would require less material.
A few attempts later, and I have what I currently use for the painting process.

The Congo Line.
The Workout Group.

Let it dry, attach the rings, and BOOM! the finished product!
If you don't have someone in your corner, standing you back up when you get knocked down, this will be tougher. Thankfully, I did. Throughout this entire learning process, my beautiful wife, Danielle, was my greatest cheerleader and disciplinarian (thanks for the pushes). I wouldn't have fulfilled the end result without her. Muchas Gracias, mi amor! A Dios toda la gloria.